Porous materials, like drywall, act like a sponge as water wicks up the walls. Moisture becomes bound within the materials, including wall cavities.
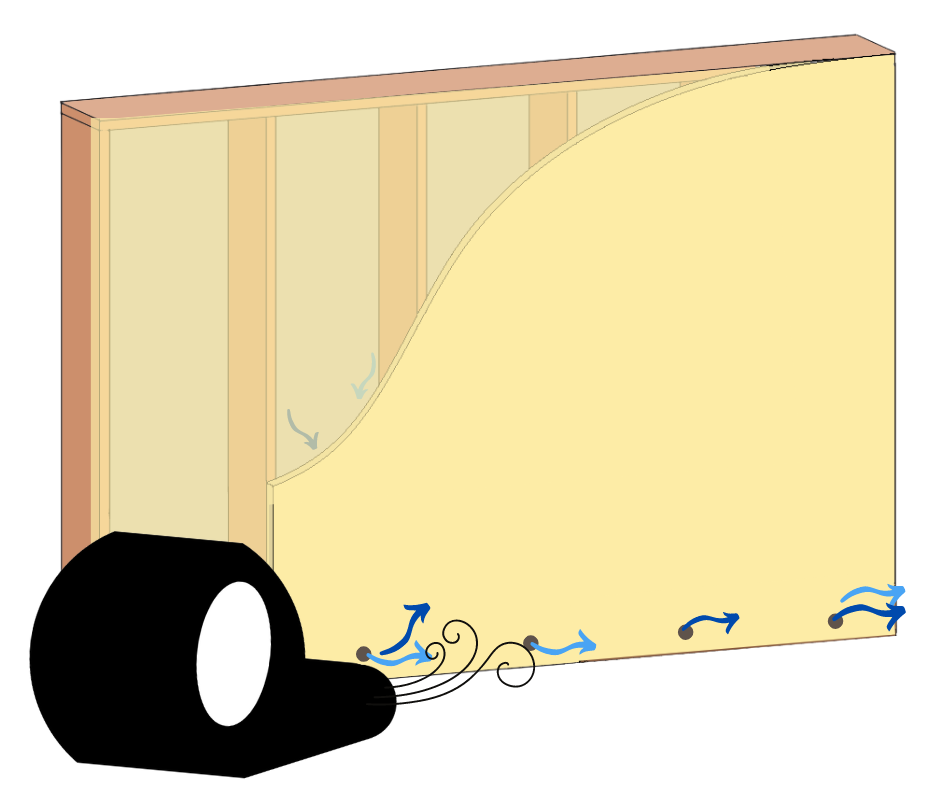
Baseboards and paint can act as a vapor barrier and slow drying. Airflow and dehumidification are necessary components of water restoration. Without airflow inside a wall cavity, vapor pressure builds up, preventing effective drying. The best way to promote airflow is through wall cavity drying. Wall cavity drying helps reduce the overall drying time of affected materials by speeding up evaporation.
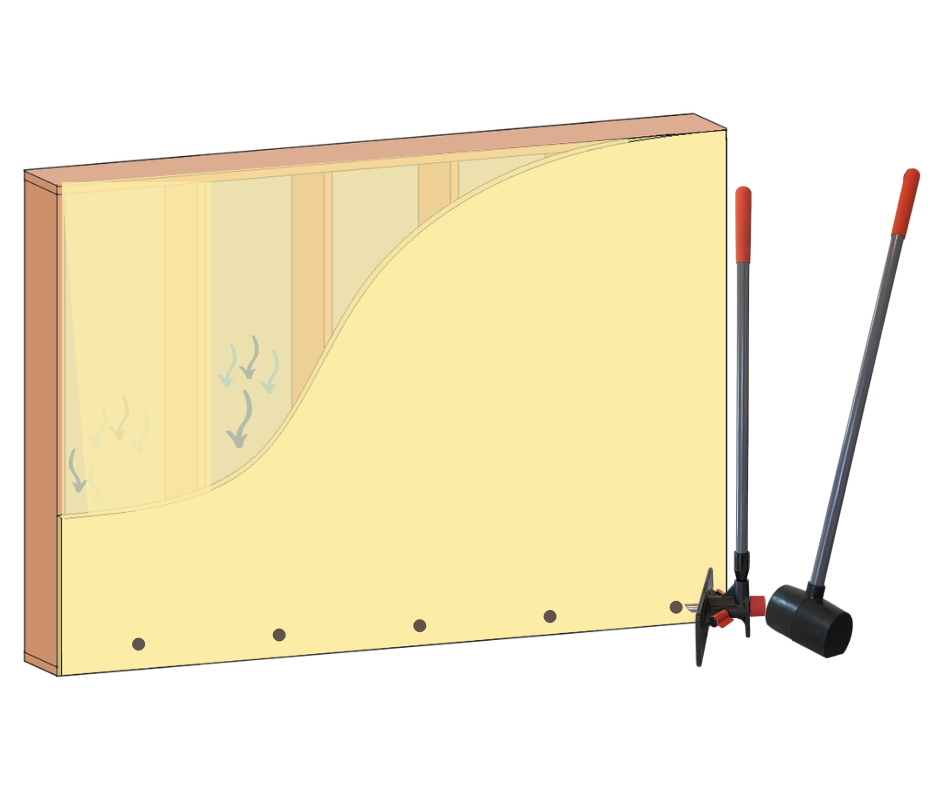
By creating a hole in between each stud bay, the vapor pressure decreases, allowing the trapped moisture to wick out and evaporate into the drying chamber. (Capillary Action is the process of moisture pulling through the pores of affected materials and then evaporating.) Vapor diffusion occurs when water molecules move through a surface due to differences in vapor pressure. Vapor diffusion typically moves from high to low pressure.
With proper airflow and dehumidification, drying can now occur within the wall cavity.
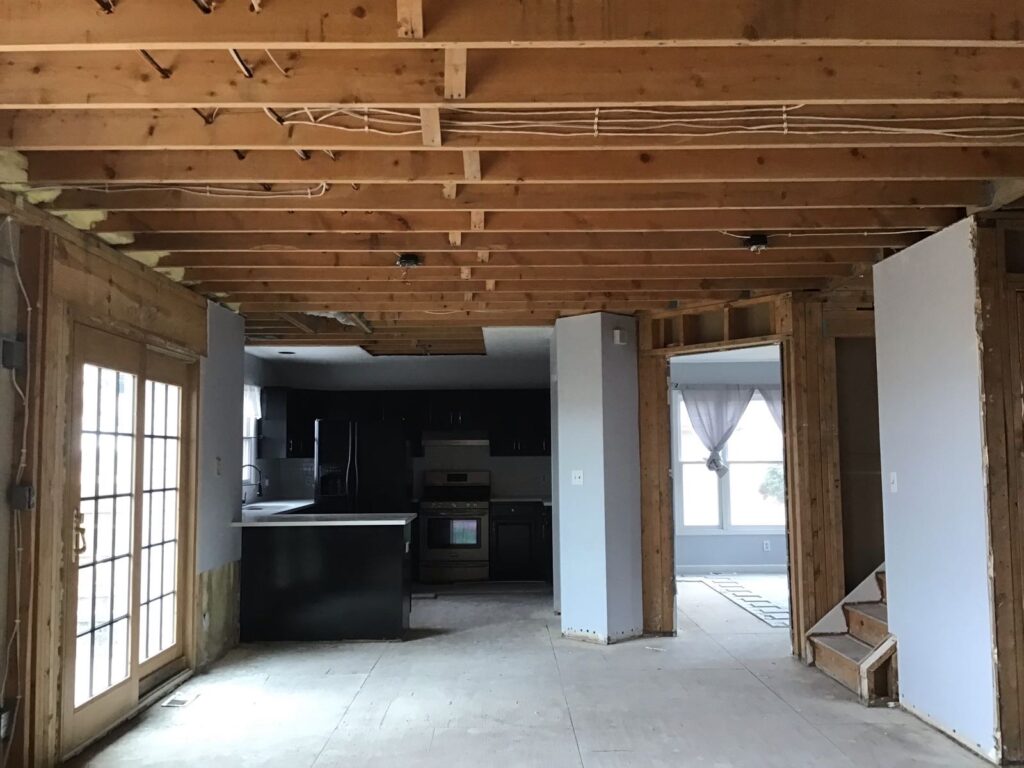
When water damage occurs, it is often necessary to restore the affected areas to their pre-loss condition. Restoration efforts typically involve removing damaged materials, drying out the affected areas, and repairing any structural damage that has occurred. However, in the process of restoration, it’s important to avoid excessive demolition.
Excessive demolition refers to the unnecessary removal of building materials that are still structurally sound. This can happen when the restoration team is overly aggressive in their efforts to remove damaged materials or when they are not properly trained to identify materials that can be salvaged. Excessive demolition can result in unnecessary expenses, a longer restoration process, and a more significant disruption to the property owner’s life or business.
To avoid excessive demolition during water restoration, it’s essential to work with a reputable restoration company that has experience in dealing with water damage. The company should have a clear understanding of what materials can be salvaged and what materials need to be removed. They should also have the necessary equipment and expertise to dry out the affected areas quickly and effectively.
It’s important to remember that not all materials need to be removed after water damage occurs. For example, drywall can often be dried out and salvaged, as long as it has not been exposed to water for an extended period. Wood framing can also be salvaged if it has not begun to rot. By identifying materials that can be saved, the restoration team can avoid excessive demolition and minimize the disruption.
Another way to avoid excessive demolition during water restoration is to take a proactive approach to maintenance. Regular inspections and maintenance can help identify potential problem areas before they become significant issues. For example, if a leaky pipe is identified and repaired promptly, the water damage can be minimized, and the need for extensive restoration can be avoided.
In conclusion, excessive demolition during water restoration can be costly and disruptive. To avoid this, it’s essential to work with a reputable restoration company that has experience in dealing with water damage. The restoration team should have a clear understanding of what materials can be salvaged and what materials need to be removed. Additionally, taking a proactive approach to maintenance can help identify potential problem areas before they become significant issues. By following these tips, property owners can minimize the disruption caused by water damage and restore their properties quickly and efficiently.
Water damage can be a nightmare for homeowners and business owners alike, and one of the most challenging aspects of water restoration is drying out wall cavities. When water seeps into walls, it can cause mold growth, structural damage, and unpleasant odors. That’s why it’s crucial to ensure that wall cavities are dried thoroughly and efficiently. In this blog post, we’ll discuss wall cavity drying and provide water restoration professionals with some essential tips for achieving successful drying outcomes.
A wall cavity is a space between the exterior and interior walls of a building. This space usually contains insulation, electrical wiring, plumbing, and other elements that can be damaged by water intrusion. When water enters the wall cavity, it can take a long time to evaporate due to the lack of airflow and sunlight, making it challenging to dry out effectively.
One of the most effective methods for drying wall cavities is using specialized drying equipment. This equipment includes dehumidifiers, air movers, moisture meters, and infrared cameras. Dehumidifiers extract moisture from the air, reducing the relative humidity in the affected area, while air movers increase airflow and promote evaporation. Infrared cameras can detect areas of moisture in walls, allowing restoration professionals to target these areas specifically.
It’s also important to remember that drying out wall cavities can be a time-consuming process, and it’s essential to monitor the drying progress regularly. Restoration professionals should use moisture meters to check the moisture levels in the affected area regularly. Moisture levels should be checked in both the affected area and adjacent areas to ensure that the moisture hasn’t spread beyond the affected area.
In addition to drying out wall cavities, it’s also crucial to address any underlying issues that led to the water damage in the first place. If the water damage was caused by a leak or a broken pipe, the source of the water must be fixed before restoration can begin. Failing to address the underlying issue can lead to recurring water damage and costly repairs in the future.
In conclusion, wall cavity drying is a critical component of the water restoration process, and it’s essential for restoration professionals to approach it with care and attention to detail. By using specialized drying equipment, ensuring proper ventilation, monitoring progress regularly, and addressing any underlying issues, restoration professionals can achieve successful drying outcomes and prevent further damage to the affected area.
Drying water-damaged walls is a crucial step in the restoration process. However, it can be a complicated process that involves several stages. Fortunately, there are different ways to dry walls, depending on the severity of the damage.
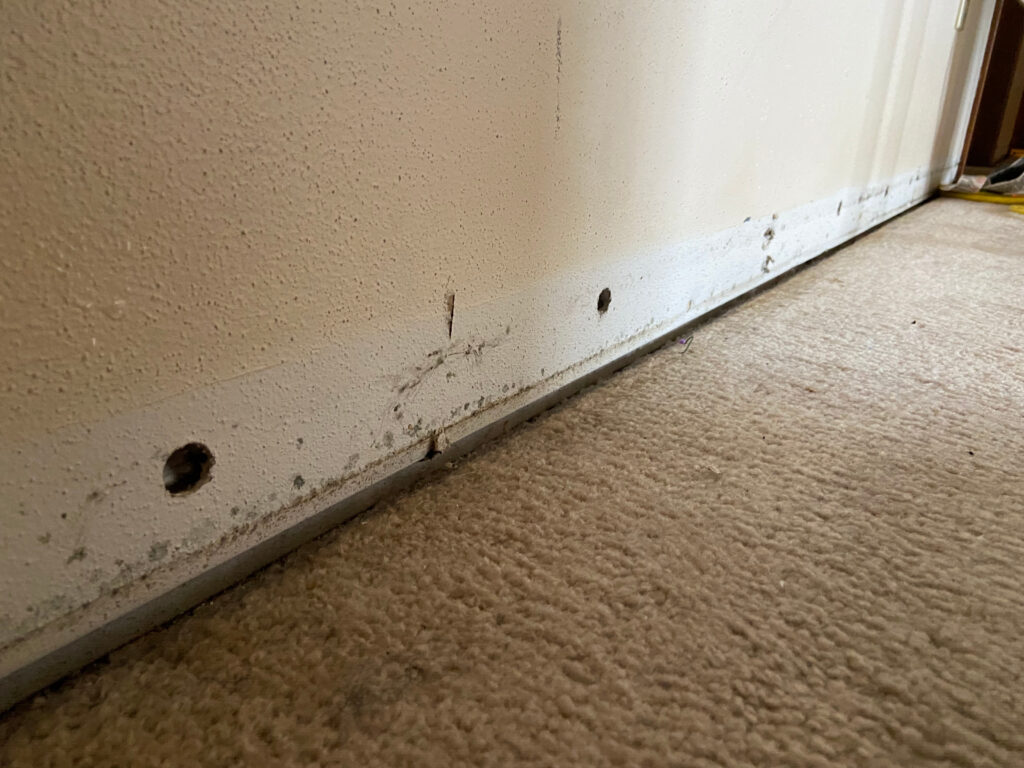
Firstly, let’s discuss the importance of wall cavity drying. Wall cavity drying is a process that allows airflow to access the affected wall cavities by creating holes in the drywall. This process is especially useful for the second and third stages of drying, drying through capillary action and vapor diffusion. By removing the baseboard and creating one 5/8″ hole every 14-16 inches, moisture trapped inside the materials can turn into vapor and evaporate into the drying chamber. Wall cavity drying can help reduce the overall dry time of affected materials.
When should you use wall cavity drying methods? There are several general guidelines to follow. Wall cavity drying is useful to achieve the standard drying time of 3-5 days, to decrease demolition such as “flood-cutting,” to dry rooms without direct air circulation, to dry hard-to-reach spaces, and in conjunction with specialty cavity drying systems and equipment. However, it is important to assess each situation and choose the best tool for the job.
Four pro tips for wall cavity drying.
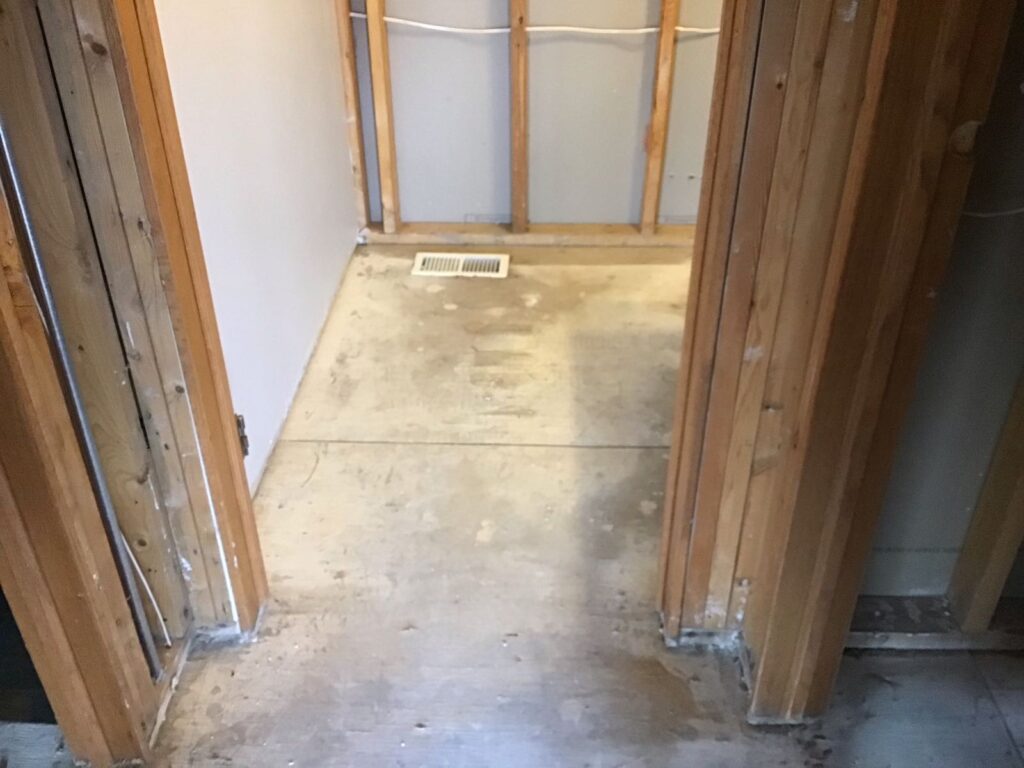
Firstly, removing the baseboard allows capillary action to occur, and bound moisture in the walls may wick out through the bottom of the walls. To reduce secondary damage to affected walls, carefully score the top of the baseboard to disconnect it from the wall or wall covering.
Secondly, an aerator can be used to create the necessary holes in the drywall. Restoration Tools has developed an innovative tool called the Aerator that speeds up this process by 15 times.
Thirdly, it is important to consider potential contaminants during inspection for the proper safety and health of customers and technicians. (Cat 1, 2, or 3)
Lastly, be sure to follow the EPA’s Lead RRP procedures when doing demolition in a building built before 1978. Older buildings may have lead paint or asbestos, and it is imperative that safe abatement procedures are followed.
In conclusion, drying water-damaged walls is a complicated process that involves different stages. Wall cavity drying is an effective method to achieve the standard drying time of 3-5 days, decrease demolition, and dry hard-to-reach spaces. It is essential to assess each situation and choose the best tool for the job. Remember to consider potential contaminants and follow proper safety procedures during the restoration process. Restoration Tools’ Aerator is an innovative tool that can speed up the process of creating necessary holes in the drywall by 15 times.
Watch the video below to see the process of Wall Cavity Drying.