
General Guidelines for Wall Cavity Drying
by Jocelyn Hare; e-published in R&R Magazine
Wall cavity drying. It’s a simple concept, but what does it do for the drying process and why is it so important?
We know the drying process consists of three stages:
- Removal of surface water through evaporation – using airflow of warmer drier air to evaporate moisture as it wicks from the material pores.
- Removal of free water through capillary action – as long as surface tension is decreased and the material pores are still wet, water will continue to be pulled from the affected materials and then evaporate. Baseboard is a common inhibitor to the capillary action, so it is commonly detached.
- Removal of bound water through vapor diffusion – capillary action can no longer continue, forcing the moisture to turn into vapor and evaporates from inside the pores. The third stage of the drying process is the most difficult to achieve in materials that do not have full airflow on all sides of the affected materials.
Wall cavity drying is especially useful for the second and third stages (drying through capillary action and vapor diffusion). Let’s take wet walls of drywall as an example. After removing the baseboard, which blocks air flow, technicians may create ⅝” holes along the perimeter of the affected walls. Through a combination of the pressure exerted, the volume of the space, and the latent energy, water is taken from its physical state and turned into a gas, or vapor. This process can also take place in ceiling and cabinet cavities.
So when should you use wall cavity drying methods? Here are some general guidelines:
- to help achieve the standard drying time of 3-5 days
- decrease demolition, such as “flood-cutting”. While gypsum board loses structural integrity when wet, the strength returns as it dries, allowing for salvageability.
- Category 1 and Category 2 losses – be sure to consider all potential contaminants during inspection for proper safety and health of customers and technicians.
- to dry rooms without direct air circulation (such as server/computer rooms)
- to dry hard to reach spaces through the backside of an adjoining room
- to dry under cabinets and vanities
- in conjunction with specialty cavity drying systems and equipment
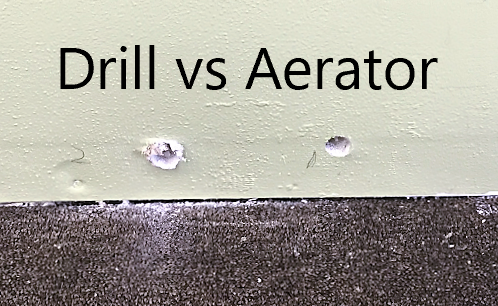
There isn’t a “one size fits all” method for water restoration, as each job and customer is unique. It is important to assess each situation so you can use the best tool for the job. After removing the baseboard, being sure to score it so as to not cause secondary damage, the most common method of creating holes for wall cavity drying is with a drill and vacuum. Did you know you can typically add this as a line item in your estimates? A fact of the restoration industry is the high margin profitability of equipment rental, and conversely, the low margins associated with labor intensive tasks. When you remove affected materials that could have been dried, you decrease the amount of drying equipment needed. Drying wall cavities allows you to minimize your labor costs while maximizing the amount of drying equipment on a job.
A new tool has emerged in the market, called the Aerator, that speeds this process by 15 times. This innovative tool is designed and produced by Restoration Tools. The team has over 40 years of combined experience in the disaster restoration industry and is improving restoration one tool at a time. To learn more about the Aerator and Restoration Tools, visit restorationtools.com.
Be sure to follow the EPA’s Lead RRP procedures when doing demolition in a building built before 1978. Older buildings may have lead paint or asbestos, and it is imperative that safe abatement procedures are followed.